
This post is sponsored by Gorilla Wood Glue, which I used to construct my DIY mid-century plant pot (though all opinions are my own). It’s a very robust, reliable glue – easy to use, but extremely strong. Perfect for this project!


Ahh, Valentine’s Day. The season of rose bouquets and heart-shaped chocolates. But what do you get for someone who isn’t really into pink hearts or cuddly toys? Answer: a DIY mid-century plant pot!
I’ll be honest; I’m not the most romantic person, nor is my partner Gareth – so we don’t often do Valentine’s gifts for each other. But this year, I thought I’d break routine and surprise him with a little handmade gift.
I like the idea of a traditional bouquet of flowers, but it’s just not Gareth’s (or my) style… instead, we tend to go for succulents and leafy houseplants. With this in mind, I bought a simple white plant pots and used a bit of DIY magic on it (with a helping hand from my Gorilla Wood Glue).


How To Make Your Own DIY Mid-Century Plant Pot
Supplies and tools
- Gorilla Wood Glue
- A small plant pot with vertical sides
- Square wooden dowels (approximately
- Mitre saw or suitable alternative
- Ruler or tape measure
- Sandpaper
- Elastic bands
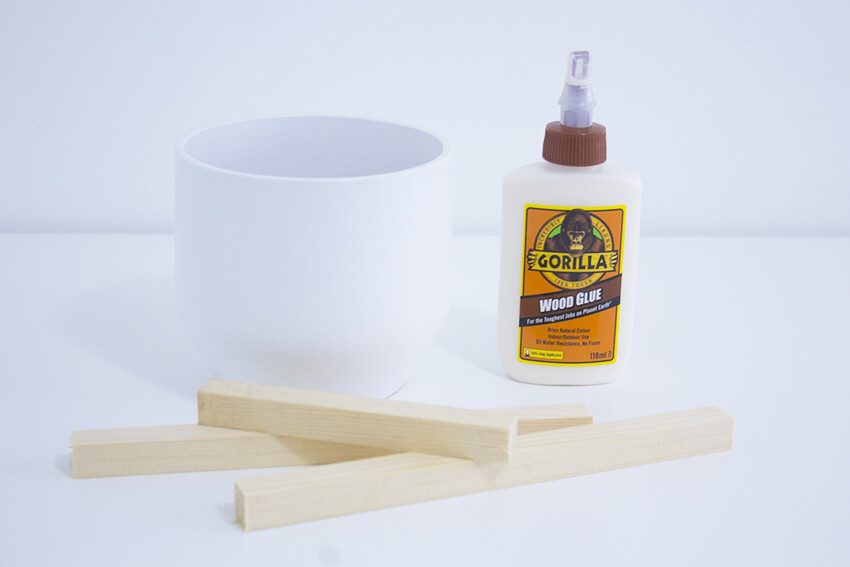
Tutorial
1. Start by taking your plain plant pot and measuring it’s diameter and height. Make a note of these, as you’ll need them in the next step. The success of this project is all in the accuracy of your measurements, so don’t rush this!
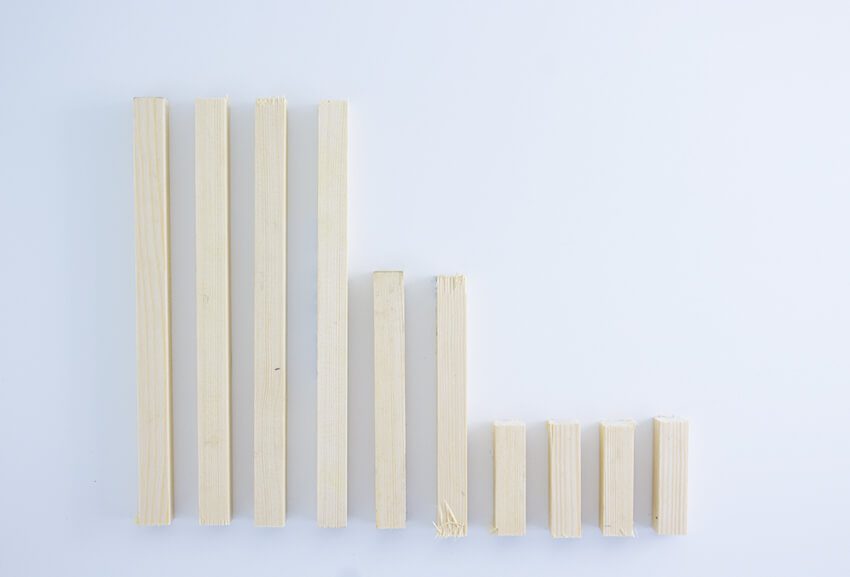
2. To construct your wooden base, you’ll need to cut a square dowel into 10 separate pieces, which will measure as follows:
- A: The diameter of your plant pot (two pieces)
- B: 1.5 x the height of your plant pot (four pieces)
- C: Half the diameter of your plant pot, minus half the width of your dowel (four pieces).
For example, my plant pot measured 15cm wide by 20cm tall and my dowel was 1.5cm wide. My measurements were therefore:
- A: 15cm
- B: 30cm (1.5 x 20cm)
- C: 6.75cm (15cm divided by two, then subtract 0.75cm).
A mitre saw is perfect for cutting the dowels accurately – but if you don’t have access to one, then a jigsaw or even a hand-held bow saw will work well, too.

3. With your wood pieces all cut to size, smooth any rough edges with a fine sandpaper. Give them a wipe with a damp cloth to get rid of any sawdust, then leave them to dry.
4. It’s time to construct the mid-century plant pot! I used Gorilla Wood Glue to fix all of my pieces together. Simply squeeze a small amount directly onto one piece of wood using the applicator nozzle. Press this against the second piece of wood, and wipe any excess glue away with a damp cloth. Use elastic bands or a clamp to firmly hold them together, then leave to bond for at least 20-30 minutes.
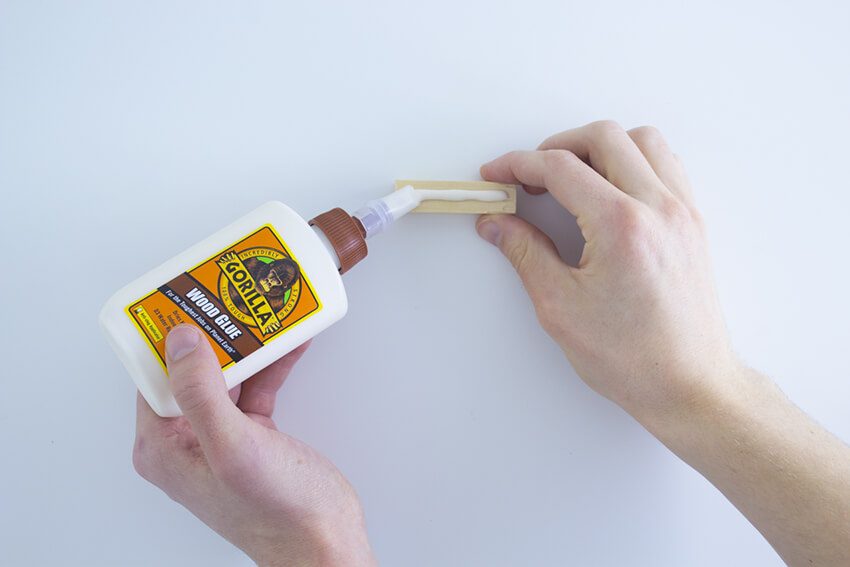
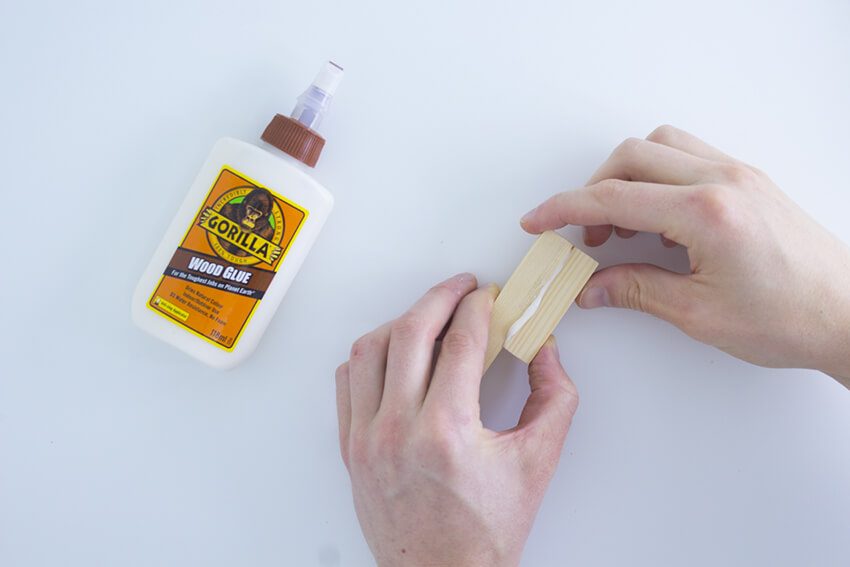
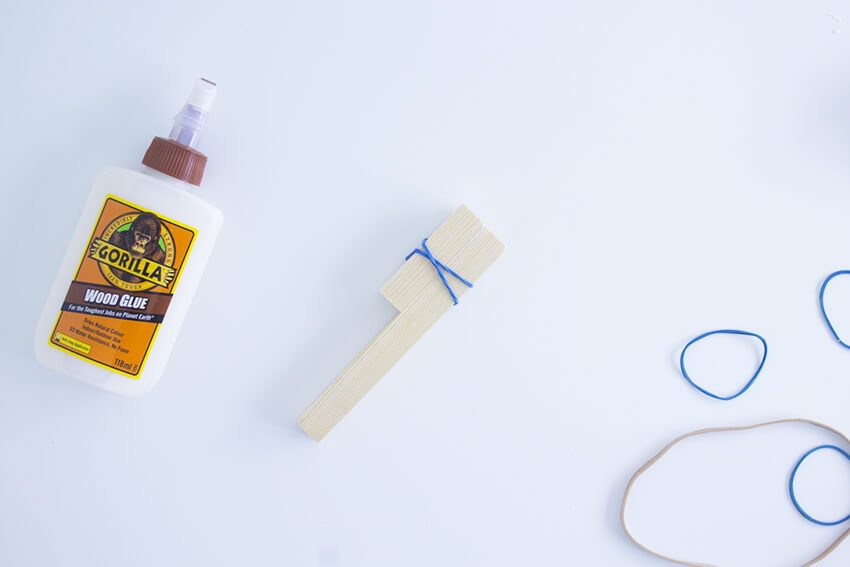
4a. Start by gluing two of the shortest pieces (C) to either end of one of the mid-length pieces (B), leaving a gap in the middle. This gap should be wide enough to slot another piece of dowelling across it.
Clamp the wood together with strong elastic bands, wrapping them as tightly as you can. Leave them for at least 20-30 minutes (I actually left mine for several hours), to allow the glue to bond securely.
Repeat this process twice, so you have two identical pieces that look like the one in the picture below.
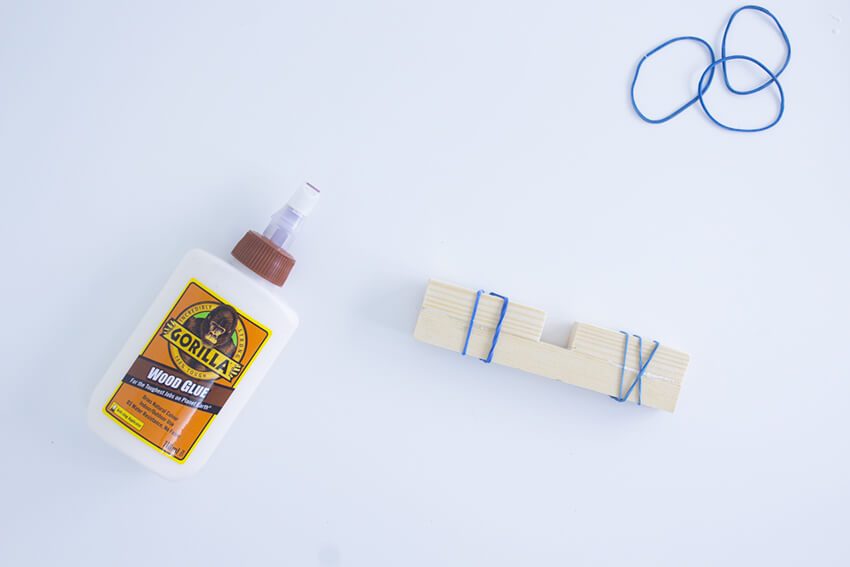
4b. You’ll be left with the four longest pieces (A). The next step is to stick each of these longer pieces to either end of the two parts you made in step 4a, to form two ‘H’ shaped pieces.
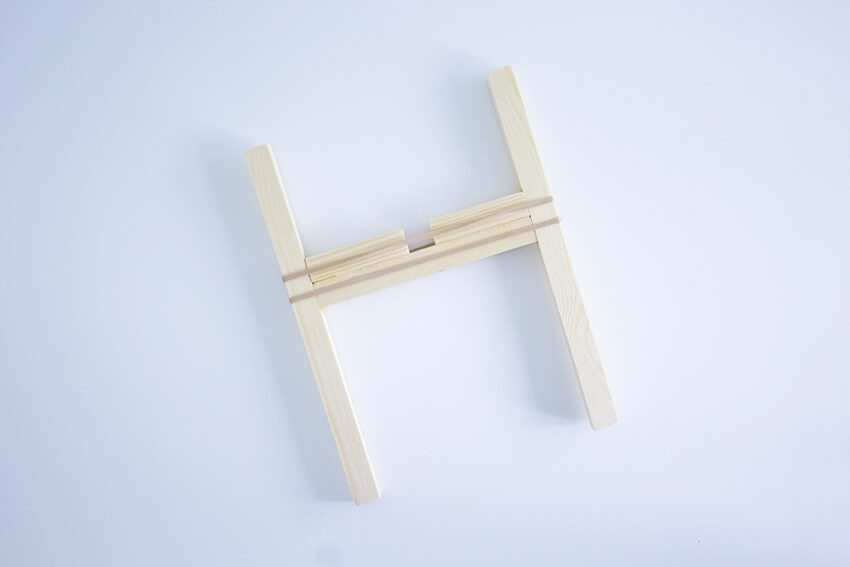
Just make sure you glue them together so the horizontal piece of the ‘H’ shape (i.e. the pieces you made in step 4a) is approximately two thirds of the way up the length of the vertical, long pieces.
Also – it’s really important that you position one horizontal piece with the gap facing upwards, and one with the gap facing downwards. This is so they can slot together at the end.
5. Finally, with the wood glued together and fully dried, you’ll be left with two ‘H’ shaped pieces. To construct your DIY mid-century plant pot, simply slot them together to make a cross shape in the middle. This will form a strong, sturdy base onto which you can place your plant pot directly. The strength of the Gorilla Wood Glue will keep everything securely in place.

I reckon this DIY mid-century plant pot will make more of an impact than a traditional bouquet of flowers. It’ll last way longer too, so it’s a win-win!
Of course, you can easily customise it for whoever you’re making it for. Try staining or varnishing the wood to bring out the wood grain. You could even paint it to give it a more colourful, modern vibe! Although personally, I love the timelessness of raw, unfinished wood. 🙂
What do you think? Are you all for this DIY, or would you prefer to receive a big bouquet of flowers on Valentine’s? Let me know in the comments! – Mike.
Don’t forget to Pin this project so you can try it later!



2 Comments
Mark Doherty
July 2, 2019 at 4:23 pmIt looks very modern yet basic design. Nice work!
Mike
July 2, 2019 at 4:31 pmThanks, glad you like it! – Mike.