

 YOU GUYS, I AM SO EXCITED ABOUT THIS BLOG POST! Yep, an all-caps intro sentence. I’m that excited! Why? Because I’m going to tell you all about my brand new Cricut Explore Air. I’ve been eyeing these up for months, so when the guys at Cricut offered to send me one to use in my makes, I absolutely jumped at the opportunity!
But first, let’s back it up a little and explore what a Cricut is…
So, what is a Cricut?
Put simply, a Cricut is a cutting machine. It’s kind of like a printer, except instead of printing ink onto paper, it has a little blade which cuts the paper. Sounds simple, but the applications are crazy varied. It can cut paper, card, felt, leather, vinyl – I’ve even heard rumours that it can tackle thin wood! The detail you can on the cuts get is insane. You can even swap the cutting blade for a scoring tool to make folds and embossed detail, or felt tips and pens to draw things. Yep, it’s a crafter’s dream.
To get a better idea of that it’s all about, I made a little Cricut Explore Air unboxing video – check it out below.
Cricut Explore Air unboxing video
Alongside the Cricut Explore Air, I’ve also got a good stock of supplies to get crafting with – vinyl and iron-on rolls, cardstock, a few cutting and scoring blades, pens and a mini cutting board. To be honest, I was a little overwhelmed with all the possibilities at first! There’s just SO MUCH I can make, where the heck should I begin?!
My first Cricut make…
Well – I started small. The very first thing I made was a set of little labels for my tin robot collection. Yep, I have a tin robot collection – I’m cool like that. I’ll share more on these in a future blog post, but here’s a few photos of the Cricut in action, cutting out my labels (the labels refer to the city that I bought the robot in)…


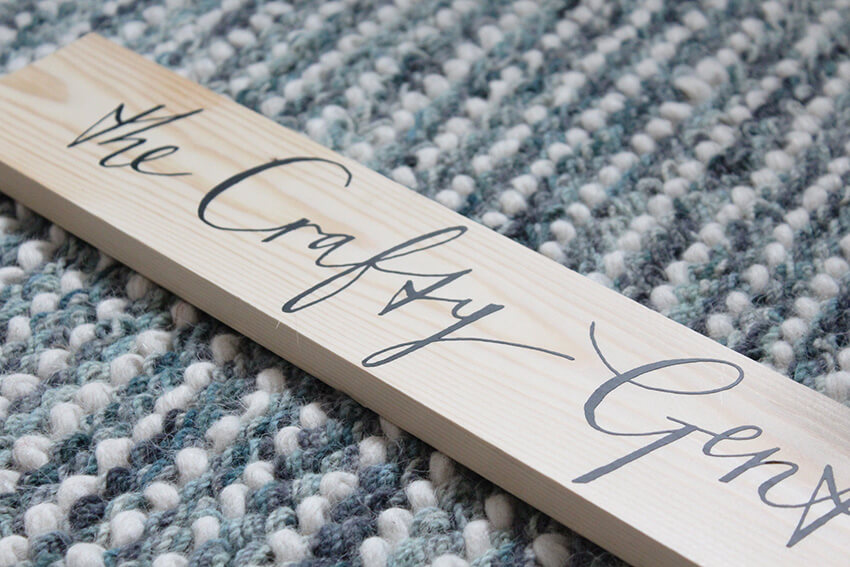
After becoming completely mesmerised by how the Cricut works, I was eager to make more! So I made a little sign for my studio, featuring The Crafty Gentleman logo. I simply uploaded a jpeg of my logo to the Cricut Design Space, put some adhesive black vinyl into the machine and let the Cricut do all the work of cutting it out! The software is surprisingly easy to use, you just drag and drop the shapes you want to cut then press go – I was pleasantly surprised by this, as I was worried it was gonna be super complicated.
Once it was done cutting out, I peeled my vinyl logo off and stuck it onto some wooden offcuts I had left over from my DIY wooden house numbers project. Ta-dah! One professional looking, custom sign for my studio. I love it! Definitely going to try out a few more vinyl designs stuck onto wood – the rustic, slightly Scandi effect is great.


Stepping it up a notch
After my first successful attempt at using the Cricut, I had a newfound burst of confidence! So, I thought I’d try something a little more creative… after seeing this idea, I thought I’d try my own version of creating a cutout based on multiple silhouette layers. A quick search on the Cricut Design Space and I had the basic shapes ready for a gardening themed bookmark (perfect for all the gardening books that Gareth and I have been buying lately!).
I used the Cricut Design Space to arrange the shapes, added a rectangular border, then set it to cut out on a custom weight card-stock. I stuck it down to a piece of backing card, trimmed the edges and added a loop of twine. Easy! That’s Christmas stocking fillers sorted, then. 🙂


In addition to these cutting projects, I’ve even branched out and tried using the scoring tool. I searched Pinterest for some good Origami nets, and one that kept on coming up was a kind of geometric dome. Most people are using it as a lampshade, but I’m using mine as a little planter!
I’m not sure how long I’ll keep my little paper dome, but it was a fun project to test out a new aspect of my Cricut Explore Air. I love how precisely it can score lines. (Side note: a Cricut would have been SO useful when I was making my Origami tree decorations for Kirstie’s Handmade Christmas last year!).


As you can see, I’m still very much in the early days of being a Cricut owner, but I’m LOVING it so far. I know there’s a hell of a lot more I can do with it – and I’ll be sharing it all here on the blog, of course. Follow me on Instagram for all the latest, as well as behind-the-scenes snippets you won’t catch on the blog!
Don’t forget to check out the Cricut site for more info – if you’re a keen crafter, then I honestly couldn’t recommend buying one enough. The machines themselves are available from Hobbycraft and Amazon. If you have any questions, just drop me a comment below and I’ll get back to you pronto. 🙂 Until next time! – Mike.
If you liked this post, help share the word! Pin this image:

Disclaimer: This post was sponsored by Cricut, but all opinions are my own. Some of the links on this page are affiliate links, which means I will receive a small commission from any purchases made after clicking them – but this will not cost you any extra. Thank you for supporting the brands that keep me blogging!
UPDATE: You can learn more about the Cricut Explore Air 2 in my guide to which Cricut machine you should buy.



5 Comments
Anonymous
November 8, 2019 at 9:24 amGreat work, a simple origami can become a perfect design on a desk.
Yvette Davies
October 9, 2019 at 6:08 pmNice work Mike!. Also the photography is amazing.
Mike
October 14, 2019 at 11:25 amThanks so much! It helps that it’s such a photogenic machine. 🙂
David
December 19, 2018 at 4:50 pmI’d love to know where to find the templet for the “Origami nets/geometric dome.” Thank you for your amazing blog and creative inspiration and spirit!
Mike
December 20, 2018 at 9:07 amHi David! Thank you so much – so glad you like my blog. 🙂 I’m really sorry, but I can’t remember the exact place I found the net… I remember searching on Google for easy Origami shapes, then coming across the one I used in the photos. But there are also lots of 3D geometric shapes for origami projects within Cricut Design Space, so worth having a look there! Hope that helps. Thanks again! – Mike.