


Halloween falls on a Wednesday this week, which I always find a little strange… Do you dress up? Or just go about the day like normal? Who knows! I reckon it should be a public holiday, to save us of this dilemma. 😉
This year, to avoid this conundrum, I’ve DIY’ed a way to add a subtle nod to Halloween – without going all-out on a costume. I used my Cricut Maker to create this wooden pumpkin pin badge. Instant Halloween vibes, without the embarrassment of turning up to work with a full face of vampire face paint!
How To Make A Wooden Pumpkin Pin Badge
Tools and Supplies
- Cricut Maker
- Cricut chipboard
- Balsa wood
- Double sided tape
- Strong glue
- Pin or badge fastening
- Optional: coloured paper
- Optional: wood stain and paintbrush
Shop these supplies! Click an image below to buy directly on Amazon:

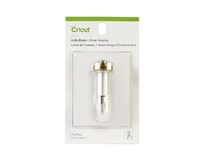

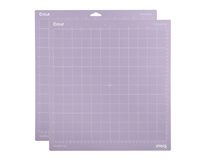
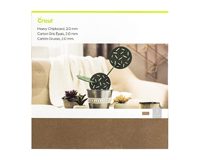

If you purchase after clicking an image, I’ll make a small commission (at no extra cost to you). This really helps to support my blog – thank you!
Tutorial
1. Open up the Cricut Design Space and find a pumpkin image you like the look of. Aim for one that has a simple, clean outline and some basic carved face details. Add the image to your canvas, resize it to 3 inches wide and then duplicate it (so you have two identical images).
2. Your DIY pumpkin pin badge will be made up of two sections: a sturdy back piece (cut from chipboard) and a decorative front face (cut from balsa wood).
- For the back section of the badge, you’ll need to use the contour tool to remove all details from one of your duplicated pumpkin images. All you need to leave is the basic outline of the overall pin (i.e. no face details). Cut this out from Cricut chipboard – see more info on this below.
- For the front face, you want to include all of the pumpkin face details. Cut this out from thin balsa wood. I recommend using a strong grip mat, knife blade and “Balsa Wood” settings within the Design Space software. Be very careful when you remove the balsa wood from your Cricut mat, as it can break quite easily.


3. With the individual components cut out, all that’s left is to assemble your DIY pumpkin pin badge. Use strong double sided tape or super glue to stick the front and back pieces together. If you like, you can use paint or wood stain to decorate the balsa wood. I actually cut the stalk of my balsa wood pumpkin off and stained this separately, to create a bit of contrast. Get creative and see what you can make!
4. Finally, use super glue to stick the pin to the back of your wooden pumpkin badge. Leave it to dry fully and it’ll be ready to wear!
How to cut chipboard with the Cricut Maker
Chipboard is one of the thickest materials you can cut on the Cricut Maker. The machine cuts it by making repeated, identical cuts over and over again until it’s gone all the way through the chipboard. Precision is critical here. Therefore, you need to be very careful when you set it up!
Before setting up, you’ll need to calibrate your machine to make it as accurate as possible. All you need to do is go through Design Space as though you are about to cut, then search for “Chipboard” when prompted to choose a material. This should bring up a message about calibrating your machine. Follow the on-screen instructions to make sure your machine is properly configured. Just make sure you test it on a piece of scrap paper – not on the chipboard itself!
With the machine configured, it’s time for the real deal. Move the star wheels (the white things on the silver bar of your Cricut machine) all the way over the the right. You don’t want these getting in the way – because the chipboard is too thick to pass under them.
Cut your chipboard down to 11 inches or less, then apply it to a strong grip mat. Make sure you align the top left corner of the chipboard to the top left corner of the mat. Firmly press this down using a brayer, then use masking tape to stick all of the edges down for additional security. You don’t want this to slip even slightly during the cut!
Now all that’s left to do is to follow the normal Design Space process to cut the material.


Of course, you can easily adapt this project to something other than a wooden pumpkin pin. I think a bat, skull or ghost would look great! Or a witch and a black cat. Or you could go all out and make the words HAPPY HALLOWEEN. The possibilities are endless! Jeez, I love Halloween so much… 🙂 – Mike.
Don’t forget to Pin the image below, so you can make it later!


4 Comments
Daniel
September 25, 2019 at 3:34 pmI was surprised by the balsa wood. From the picture, I thought the top layer was popsicle sticks and coffee stirrers. Did you end up painting it or did you leave it bare wood?
Mike
September 25, 2019 at 3:40 pmBalsa wood is one of my favourite materials to work with! Surprisingly easy to use, and really versatile. I left it as bare wood – I like the raw, neutral finish. 🙂 – Mike.
Daniel
September 25, 2019 at 4:00 pmI only tried chipboard/wood on the cricut maker once when the machine first came out. My project didn’t turn out at all and I was a bit discouraged. I may need to go back and try again!
Mike
September 25, 2019 at 4:16 pmOh no, don’t be put off! You just need to experiment to get the settings right – then it’s as easy as cutting card or vinyl (it just takes longer!). It’s worth the effort; you can make some really amazing things with balsa and chipboard!