


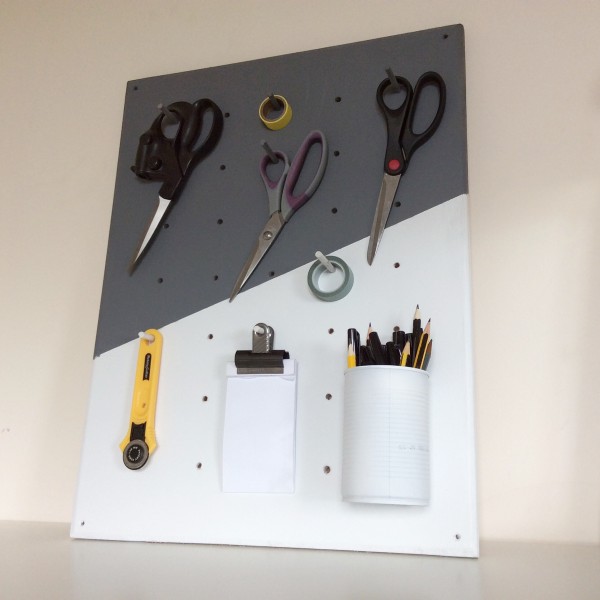
Big news guys, I finally took the plunge into the world of power tools the other week… I bought a power drill! This was a long-overdue purchase. I now feel like a superhero; a whole new area of crafting has been opened up to me.
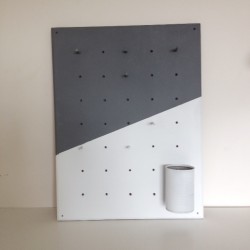
I’ve been more and more interested in woodwork over the past few months, so this new gadget is going to enable me to create much more ambitious DIYs. I wasted no time in getting stuck in with this! The very first thing I’ve made with my new drill is this geometric DIY pegboard. Peg boards are kind of everywhere just lately (Google searches for “pegboard” have more than doubled from 2012 to 2015!) – and no wonder, they combine quirky décor with practical storage, making them a perfect addition to any craft or DIY workspace. Instead of forking out £40+ for one (like this one from Urban Outfitters), just follow my simple tutorial to make your own.

What you’ll need
- A medium/large rectangle of plywood, at least 15 mm thick
- Power drill
- Hand saw
- 10 mm wide dowelling
- Fine sandpaper
- Spray paint
- Masking tape

What to do
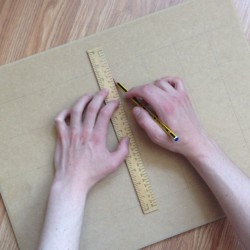


1. On your plywood, mark with a pencil where each of your peg holes will go. I found it easiest to draw a series of evenly spaced vertical and horizontal lines to form a grid, with the holes going at each point the lines cross.
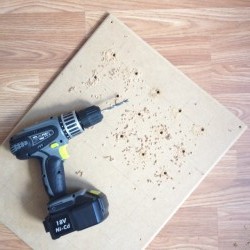
2. Drill a hole through each point you’ve marked, making sure you drill all the way through the wood. Ensure you use a bit that is the same size as your dowelling, so the pegs fit in securely.


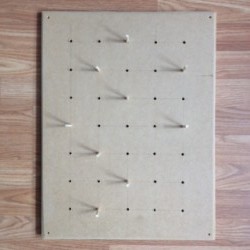
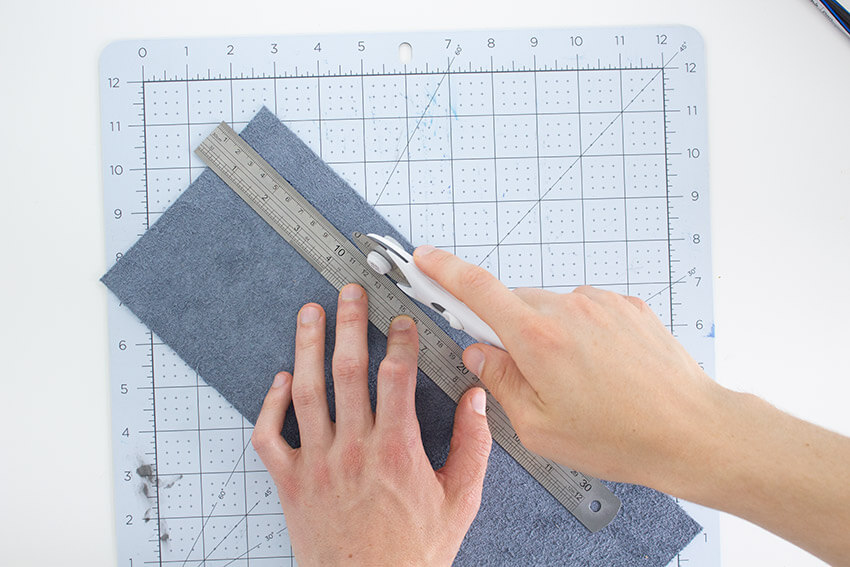
3. Cut your dowelling into approximately 6 cm lengths and sand the edges smooth. You can make as many of these dowelling pegs as you want!
4. Insert the pegs into the board – if the holes are a bit small, just drill them again with a slightly larger bit (or wiggle the drill a little as you drill through).
5. Time to paint! This step is completely optional (you might like the raw wood look), but I think paint adds a bit of personality to the pegboard. I used white and grey matt spray paints and masking tape to add a geometric colour block across the peg board. If you’re a bit more arty, you could hand paint a design into it, or add words – get creative!
6. Use your DIY pegboard to hang up your craft supplies, tools or kitchen utensils. The dowel pegs are really versatile! For example, I drilled a hole into a tin can so I could hang it from one of the dowels – be imaginative and see what you can hang on your pegboard!

I can’t quite express how thrilled I am with this project – it’s the first proper power tool project I’ve designed and I love it! If you’re a power tool newbie, or even a seasoned pro, you’ve gotta give this DIY peg board a try. Customise the size, colours and pattern to match your craft room, work space, kitchen, desk, shed, office… or go all out make one for each room! I’m already planning my next one…


14 Comments
Kris
March 25, 2019 at 4:58 amLove your blog! I’m glad I found it. I noted that you advise at least 15mm thickness for the board. I’m planning a string-art project where we’d make a custom pegboard and use yarn to create an image. Do you think going with an 8mm thickness would be fine, since we won’t be hanging heavy objects from the pegs?
Mike
March 25, 2019 at 10:39 amThank you so much! Yes, I think an 8mm thickness would be great for a yarn image. It might be worth testing it on a small piece first though, just to ensure the pegs are securely held in place! – Mike.
m
December 23, 2016 at 7:39 pmHi, I get alot of the same items (I buy in bulk) and I am looking to have a peg board that will support the long (12″) pegs so that I can do like the stores and hang several like items on one peg.
Will this work with long legs I buy? Can it handle the weight?
Thank you!
Mike
December 26, 2016 at 4:50 pmHello – this method should work with the longer pegs, yes! Although it will depend on what you plan to hang from them. Obviously, the more heavy the item, the less likely it is that the pegs will support them. You could try using a slightly thicker dowel to help support heavier items. Hope this helps!
George
January 26, 2018 at 9:53 amGreat Tutorial. I’m going to make a massive pegboard for my sons room, to hang up his (ahem…. mine ) Nurf gun collection. The prices for large Peg Board were crazy here in the UK.
Really looking forward to this!
Mike
January 28, 2018 at 7:51 pmYep, totally agree that peg board prices are crazy – DIY is the way to go!!
91 Best Etsy Christmas Gifts for Men of 2016 | Dodo Burd
October 25, 2016 at 3:13 pm[…] Pegboard […]
Creative uses for pegboards that will excite you - Craftionary
February 29, 2016 at 4:20 am[…] Make your own peg board […]
Make a DIY copper pipe desk tidy! - The Crafty Gentleman
January 27, 2016 at 6:31 pm[…] to keep things spick and span. I’ve already shared a few DIY projects on this theme (like my DIY pegboard and my DIY wooden crate), but I’m not done yet! I’ve jumped on the copper craze to […]
Functional And Practical DIY Pegboard From Plywood | Shelterness
May 25, 2015 at 2:49 pm[…] Pegboards combine quirky décor with practical storage, making them a perfect addition to any craft or DIY workspace. To make one yourself, you’ll need a medium/large rectangle of plywood, at least 15 mm thick, a power drill, a hand saw, 10 mm wide dowelling, fine sandpaper, spray paint and masking tape. On your plywood, mark with a pencil where each of your peg holes will go. I found it easiest to draw a series of evenly spaced vertical and horizontal lines to form a grid, with the holes going at each point the lines cross. Drill a hole through each point you’ve marked, making sure you drill all the way through the wood. Continue reading the tutorial in the source. […]
Ashley
May 19, 2015 at 11:02 pmLove this tutorial! Welcome to the world of power tools! 🙂 It’s a fun one to be in.
I’ve been looking for some new storage ideas for my office and this might just do the trick. Thanks for sharing!
Let’s Mingle Blog
The Crafty Gentleman
May 20, 2015 at 12:39 pmI’m glad you like it – you should definitely give this DIY a go for your office! Thanks for reading!
Sheeren Rehman
November 3, 2023 at 3:43 pmAre you going to try this? I tried this but results were not on my expectation. But this is gorgeous and awesome.
Aryl
May 17, 2015 at 7:51 pmFabulous!
So much more chic than the UO version. And well done you for stepping out of your comfort zone. Look forward to what comes next.